When I first rebedded the chainplates on Gra’inne I was very surprised. The Factory had used GE SCS2000 (SilPruf) when originally sealing the chainplates. 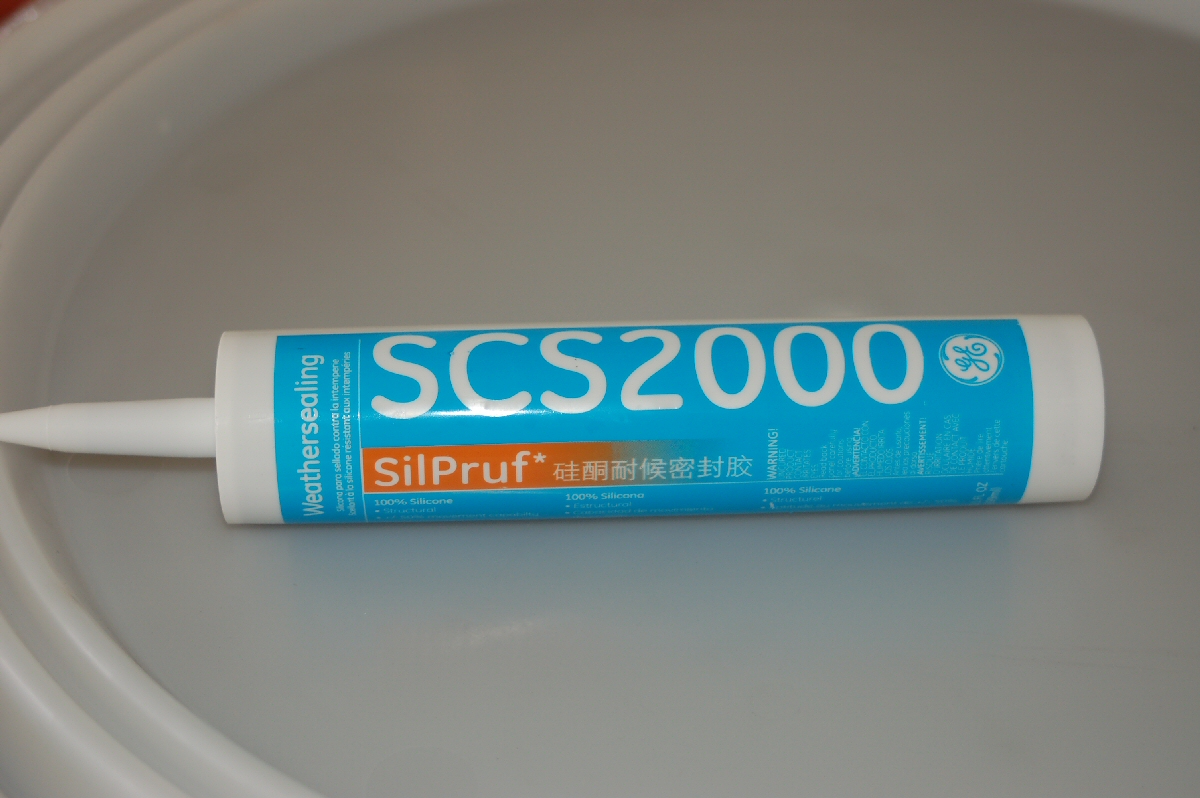 When I took everything apart and started trying to remove the old bedding I was in for quite a job. The bedding material was adhered to the chainplate tangs and to the surrounding teak. There was no moisture penetration anywhere. My only issue was that the caprail teak in several spots was so close to the tangs that I did not think I could get a proper seal when I rebedded.
The following procedure describes how I rebedded the chainplates on our boat as well as on several others.
Recommended Tools and materials:
Dremel with wood cutting bit X-Acto knife Dental tools
Needle nose pliers Sharp boning knife Medium Sandpaper
Cotter Pins Diagonal Pliers assorted wrenches Acetone
Mineral Spirits Paper towels Blue masking tape 1 Tube of SilPruf
Caulk Gun Loos Gauges Lanocoat
I first check the rig to make sure that the mast is reasonably straight and record the tension on the shrouds and stays.
REMOVAL:
Pick one side of the boat and remove the cotter pins on the inside of the turnbuckles. For now leave the cotter pins in the toggle jaw pins. Unscrew the turnbuckles on each of the shrouds and stays so that they are loose enough to remove from the chainplates. One at a time remove the cotter pins from the toggle jaw pins and take each shroud/stay loose from the chainplate tang. Secure the loose rigging so that it is out of the way and will not damage the gelcoat. Clean the turnbuckle threads with mineral spirits and lightly lube with Lanocote. The threads on the turnbuckles should not bind at all.
Remove the 4 screws holding each of the chainplate covers to the caprail and then remove the covers. You may have to use an X-Acto knife to trim back whatever teak coating you use so that you can lift the covers off the caprail. Carefully pry the chainplate covers off the caprail. This will be easy if the bedding is in bad shape, not so easy if the bedding is in good shape. Use the X-Acto knife and trim the bond between the old bedding and the teak and then do the same on the chainplate tang. Use a boning knife to get down into the caprail to try and cut free the old bedding. At this point you will need to use dental tools, the knives, needle nose pliers, etc and cut/clean all of the old bedding out of the caprail cutout. The cleaner the cutout is when you finish the better the new bedding job will be.
I like to have at least 1/4″ clearance around the entire chainplate tang so that when I rebed I can easily get a good application of the SilPruf into the caprail cutout and around the tang. Use the X-Acto knife or Dremel and trim the teak 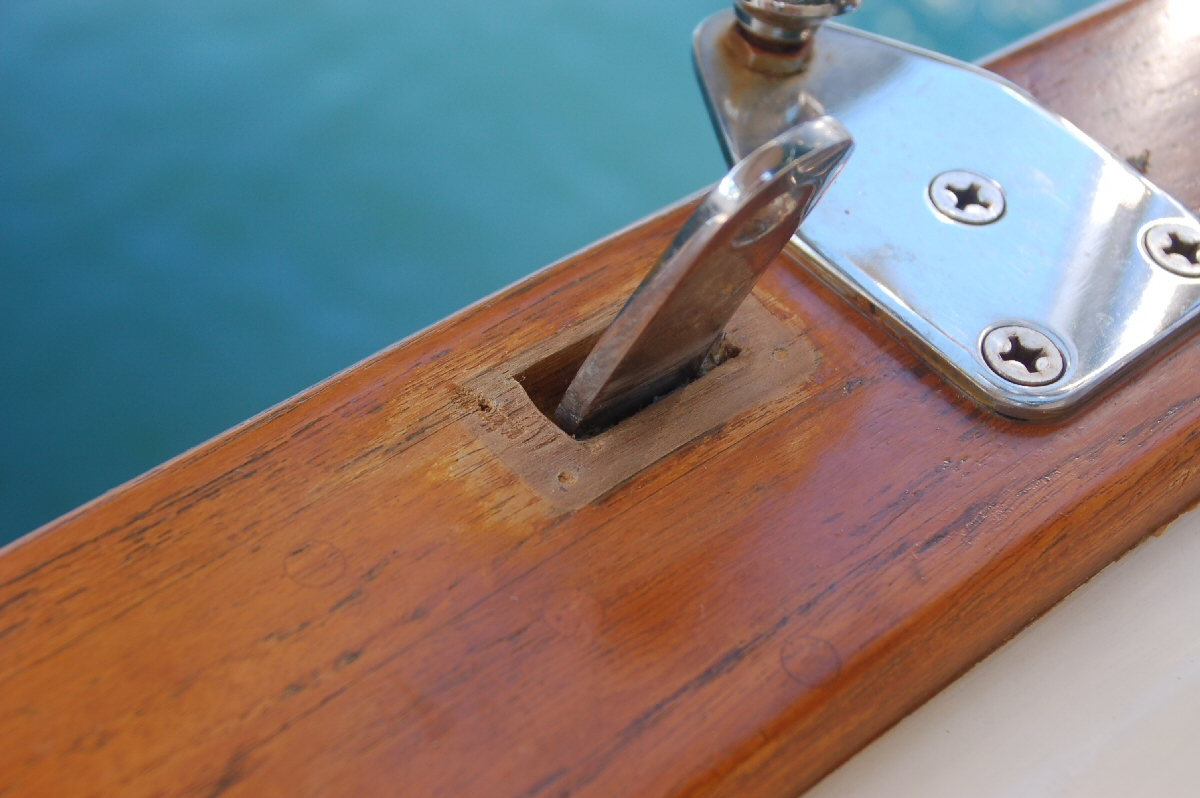 back as necessary so that you have a good clear area for the new bedding material. Avoid cutting out to much material as you want to maintain a good base for the cover plate. Vacuum the area around the tang as necessary. When all of the old bedding is removed you should be able to see the gelcoat under the caprail and also see the area where the tang goes down through the deck.
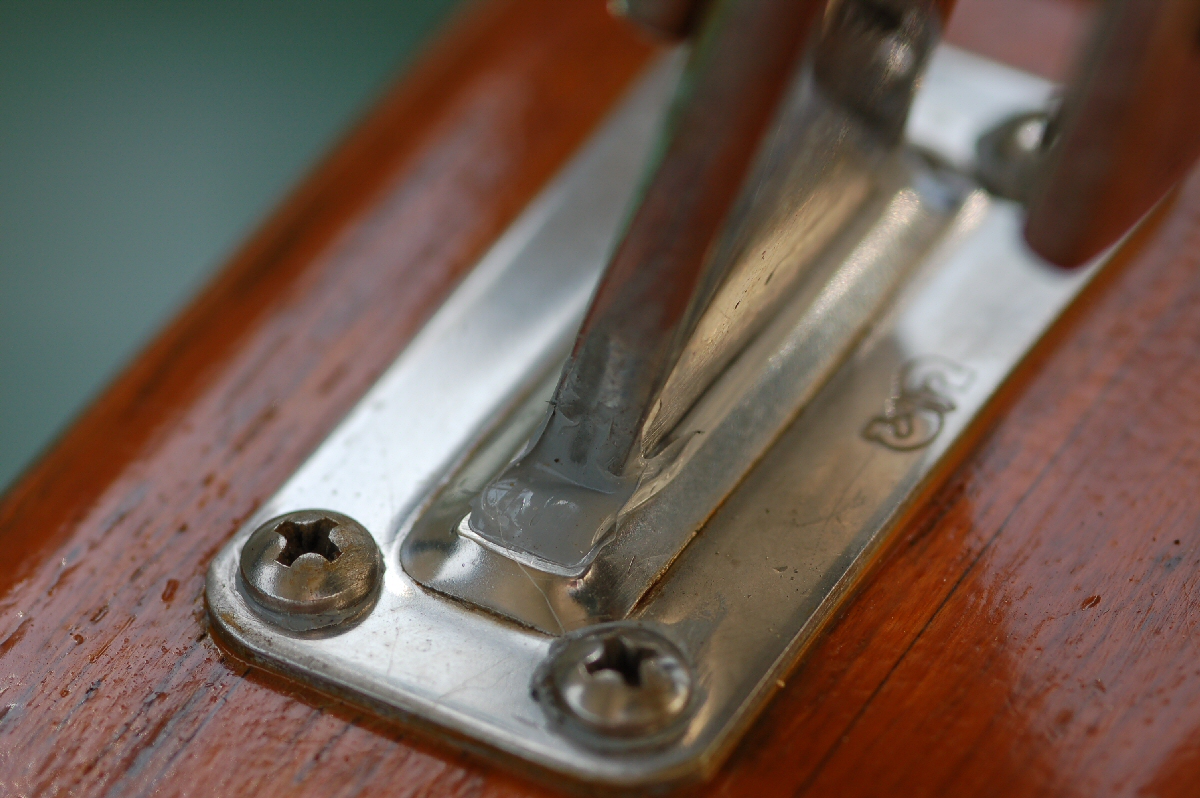
Use sandpaper to clean the last traces of bedding material off of the tang, the caprail, and area where the cover plate will be reinstalled. Use a knife and sandpaper to clean the cover plate. Put the cover plates back in position over each tang and reinstall the screws. Use the blue masking tape and mask up to the cover plates so that excess bedding material can be easily cleaned up afterwards. Remove the screws and cover plates and clean with Acetone. Also clean the tangs and teak with Acetone and let dry briefly.
REINSTALLATION:
Cut the tip off the SilPruf so that the tip is open about 1/16″. Use a long nail or the seal breaker tool on the caulk gun to break the interior seal inside the caulk tip. Insert the tip of the caulk tube as far into the caprail cutout as you can and slowly squirt the Silpruf into the opening while slowly moving the caulk gun. You want to try and completely fill the area around the chainplate tang and avoid air pockets if possible. Squeeze a small amount of SilPruf into and around each of the screw holes in the teak as well. Overfilling a bit is good as you want the bedding material to ooze out as you reinstall the cover plate.
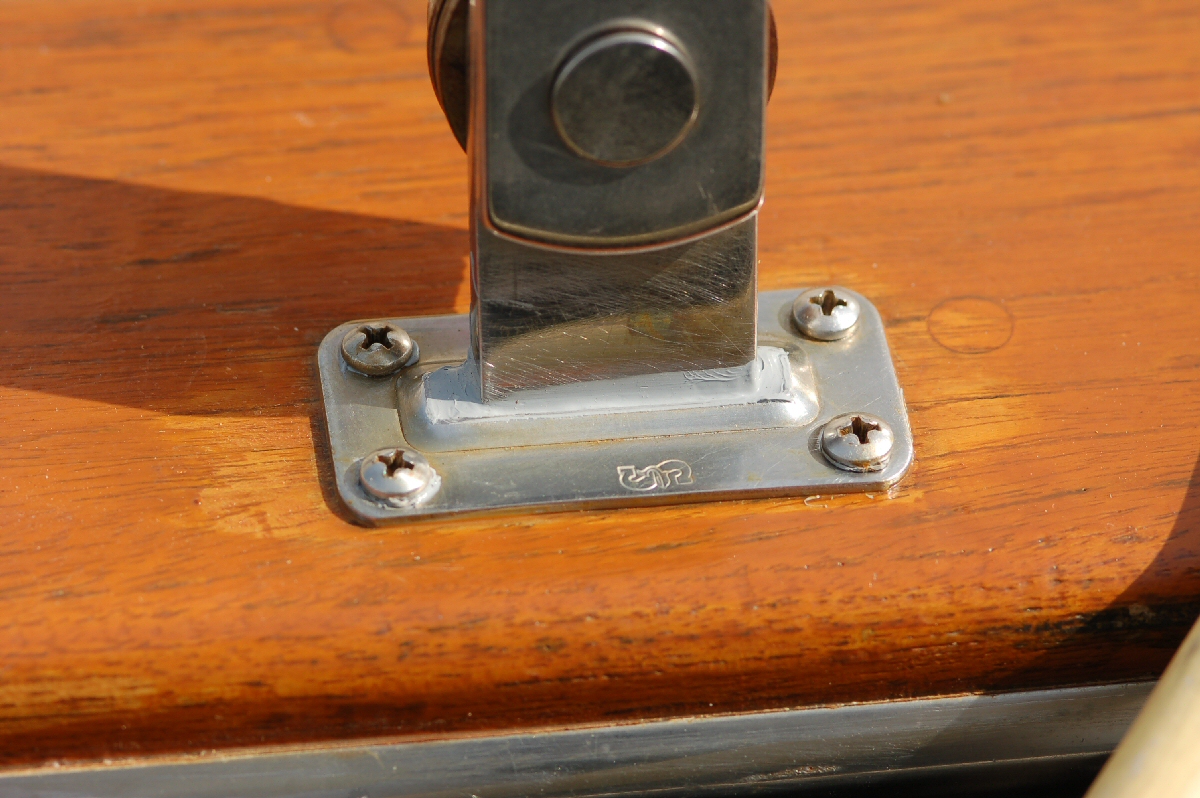
 Slide the cover plate over the tang and tighten in place allowing the excess Silpruf to squeeze out as you do. Wipe up the excess material using a trimmed Popsicle stick and lots of paper towels. The SilPruf should seal the screw holes, seam between the cover plate and caprail and the area between the tang and cover plate.
Remove the blue tape and finish cleanup. Try to do all of the chain plates on one side then reattach and retension the rig. Use new cotter pins on the turnbuckle ends and also on the toggle jaw pins. There is no need to rush at this point as it takes several days for the Silpruf to completely cure so you have plenty of time to finish this side and move on to the other and also the backstays.
One tube of Silpruf is more than enough to do all of the chain plates. If you spread the complete job over several days you can protect the remaining Silpruf by squirting just a little bit of excess out of the caulk tube and wrapping the tip with masking tape.
 After the SilPuf has set up some, I usually wait a day, reapply several coats of Cetol to the caprail.